12. Auto Labeling
Pro Edition officially archived
The Pro Edition is officially archived and will no longer receive updates as a separate product.
Current auto annotation workflow
In the new Standard Edition, open Image annotation → Model auto annotation, install the required inference component, and select your model. Neither Pro Edition nor Trainer is required.
Annotation and auto annotation guide · Get inference components
Inference components run existing models and do not include a model-training environment. The Pro training steps and older interfaces below are retained only as historical documentation.
Historical Pro features (archived)
1. Core Features
- Multi-architecture support: Fully supports standard horizontal object detection and OBB rotated box detection.
- Full-series support: The training algorithm is deeply adapted to the YOLO26 series (n, s, m, l, x).
- Zero-configuration import: Parses the raw dataset directory directly, with no extra packaging required.
2. Model Training Steps
Step 1: Path Configuration
- Dataset directory: Click the [...] button and point it to the folder containing the images and their corresponding JSON labels.
- Model repository directory: Choose the path where the training results (weights, logs, charts) will be stored.
Step 2: Parameter Adjustment
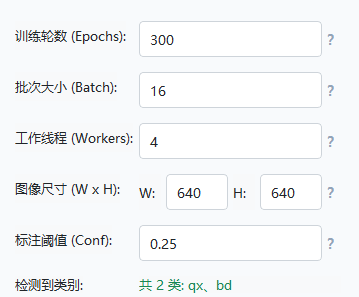
- Set the epochs and the batch size in the Basic Parameters panel.
- [Important]: The image size (W x H) is recommended to stay at the default 640 * 640. If you need to change it, the value must be a multiple of 32.
- Fine-tune according to your hardware in the Advanced Parameters panel.
Step 3: Start and Monitor
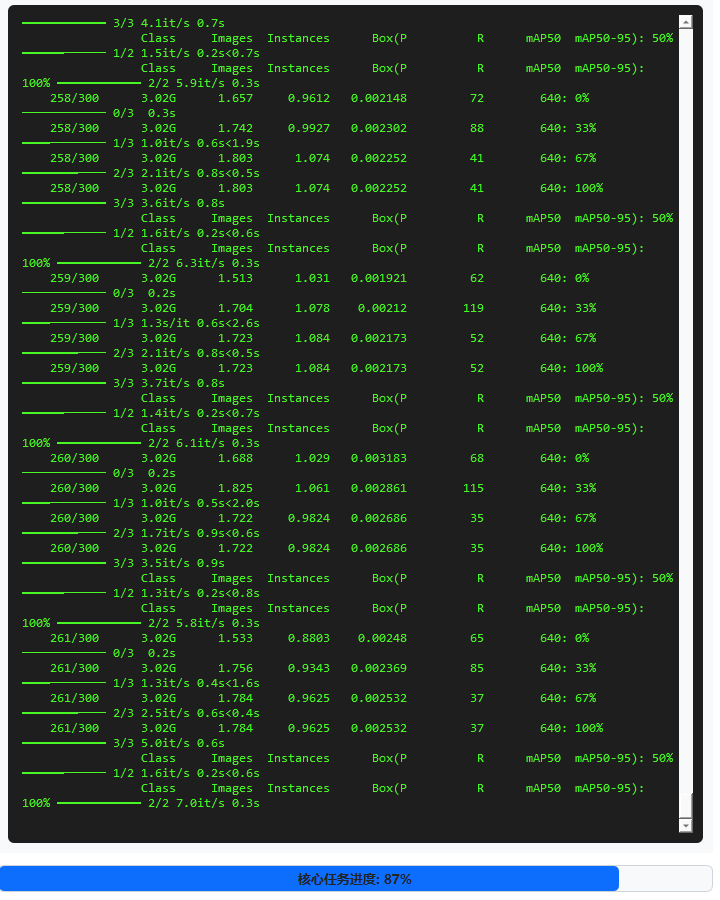
- Click [Start Training] and watch the real-time logs and progress bar in the built-in console.
Box Loss
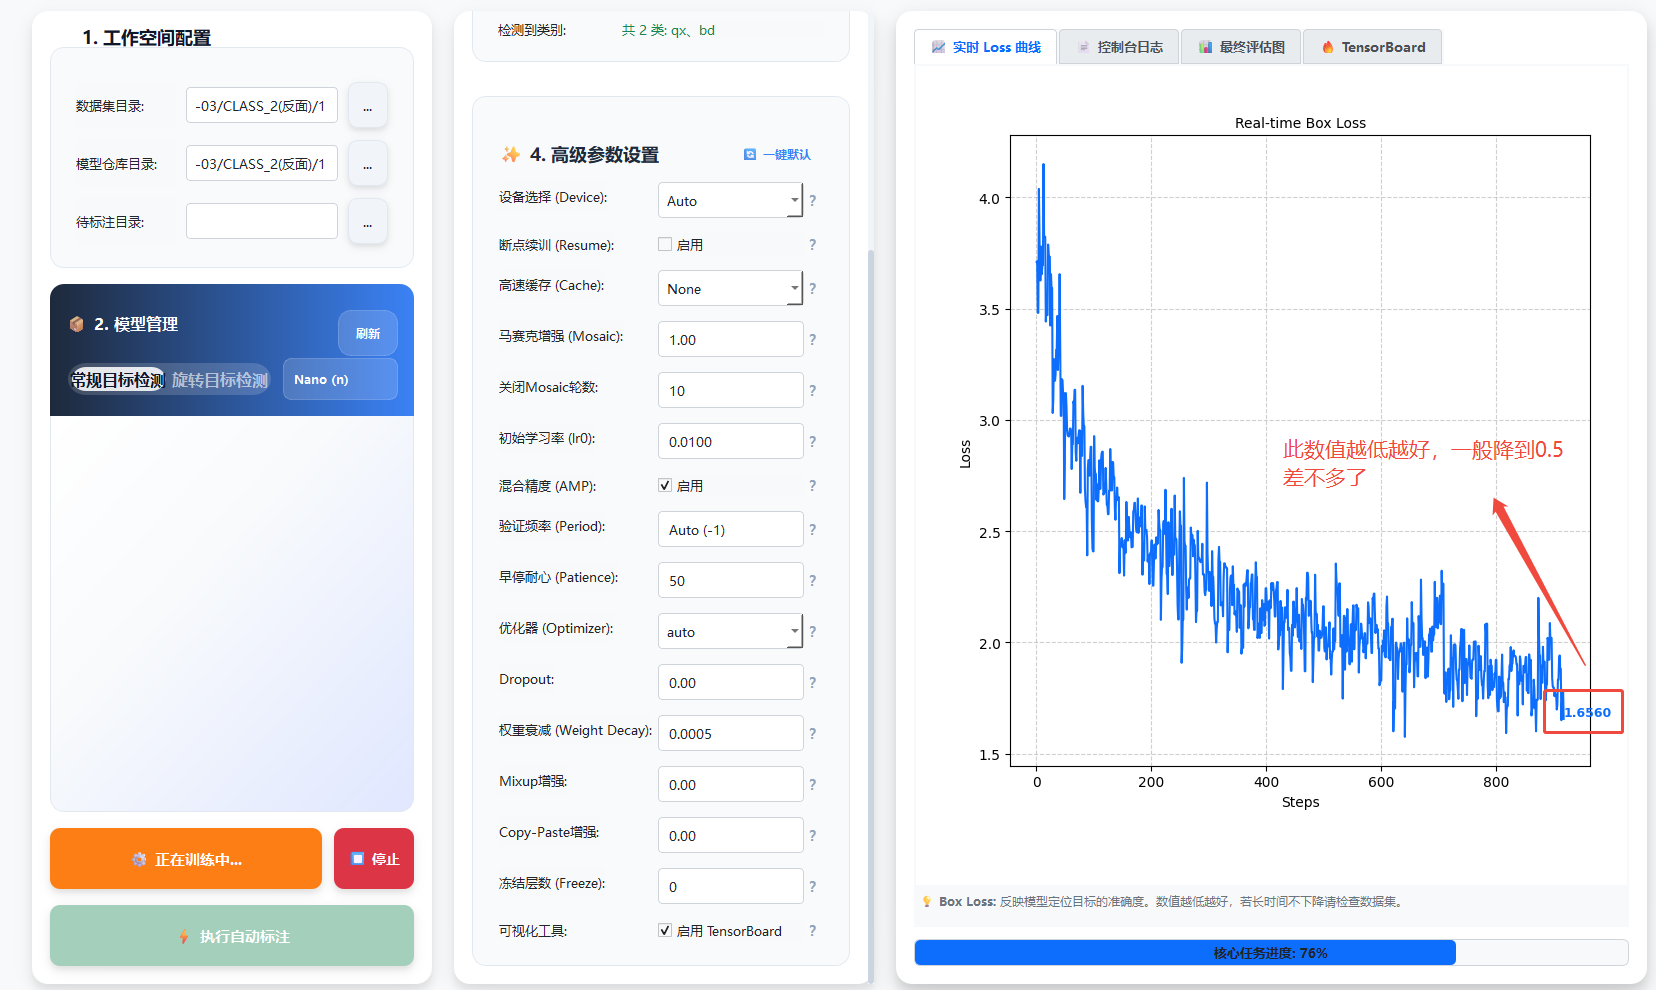
The lower the loss value, the better; in general it drops to around 0.5.
3. Basic Training Parameters
| Parameter | Code | Description |
|---|---|---|
| Epochs | Epochs | Determines how many complete passes the model makes over the data. The larger the value, the longer the training takes. |
| Batch size | Batch | The number of images fed to the model at a time. Lower it if your GPU memory is limited. -1 means automatic. |
| Workers | Workers | The number of data loading processes. On Windows, 0 ~ 4 is recommended to avoid errors. |
| Image size | W x H | 640 * 640 by default. The size the input images are scaled to; it must be a multiple of 32. |
| Confidence threshold | Conf | The confidence threshold for auto labeling; boxes below this value are filtered out. |
4. Advanced Parameters
Configuration Recommendation
If you are unfamiliar with the following deep learning parameters, simply keep the default settings. The system already ships with optimal default values tailored to industrial scenarios.
| Parameter | Code | Description |
|---|---|---|
| Device | Device | Auto detects automatically, 0 is the first GPU, cpu forces the use of the CPU. |
| Resume | Resume | When checked, the last interrupted last.pt is located automatically and training resumes from it. |
| Cache | Cache | Caches the data to memory or disk to speed up training. Recommended to turn it off when memory is limited. |
| Mosaic | Mosaic | Enables the probability of multi-image mosaic augmentation (0.0 ~ 1.0). Improves small-object perception. |
| Close Mosaic | Close Mosaic | Turns Mosaic augmentation off for the last N epochs, preventing the model from oscillating late in training. |
| Initial learning rate | lr0 | The initial learning rate, generally the default 0.01; it controls the step size of parameter updates. |
| AMP | AMP | Recommended to enable. Saves GPU memory and speeds up training, with essentially no impact on accuracy. |
| Period | Period | How often the weights are saved or validation is run, in epochs. -1 means automatic. |
| Patience | Patience | Stops training when the validation metric shows no improvement for N consecutive epochs. 0 disables it. |
| Optimizer | Optimizer | auto selects automatically; SGD, AdamW, etc. can also be specified manually. |
| Dropout | Dropout | The regularization ratio (0.0 ~ 1.0), used to prevent the model from overfitting. |
| Weight decay | Weight Decay | The L2 regularization coefficient, which prevents overly large model weights from degrading generalization. |
| Mixup | Mixup | The probability of blending two images and their labels (0.0 ~ 1.0). Increases sample diversity. |
| Copy-Paste | Copy-Paste | Randomly copies and pastes objects onto other images, improving the recall of the model. |
| Freeze | Freeze | Freezes the weights of the first N layers of the model. Suitable for fine-tuning a pretrained model. |
| Visualization tool | TB | When enabled, detailed logs (loss, metrics) are recorded with TensorBoard. |
TensorBoard
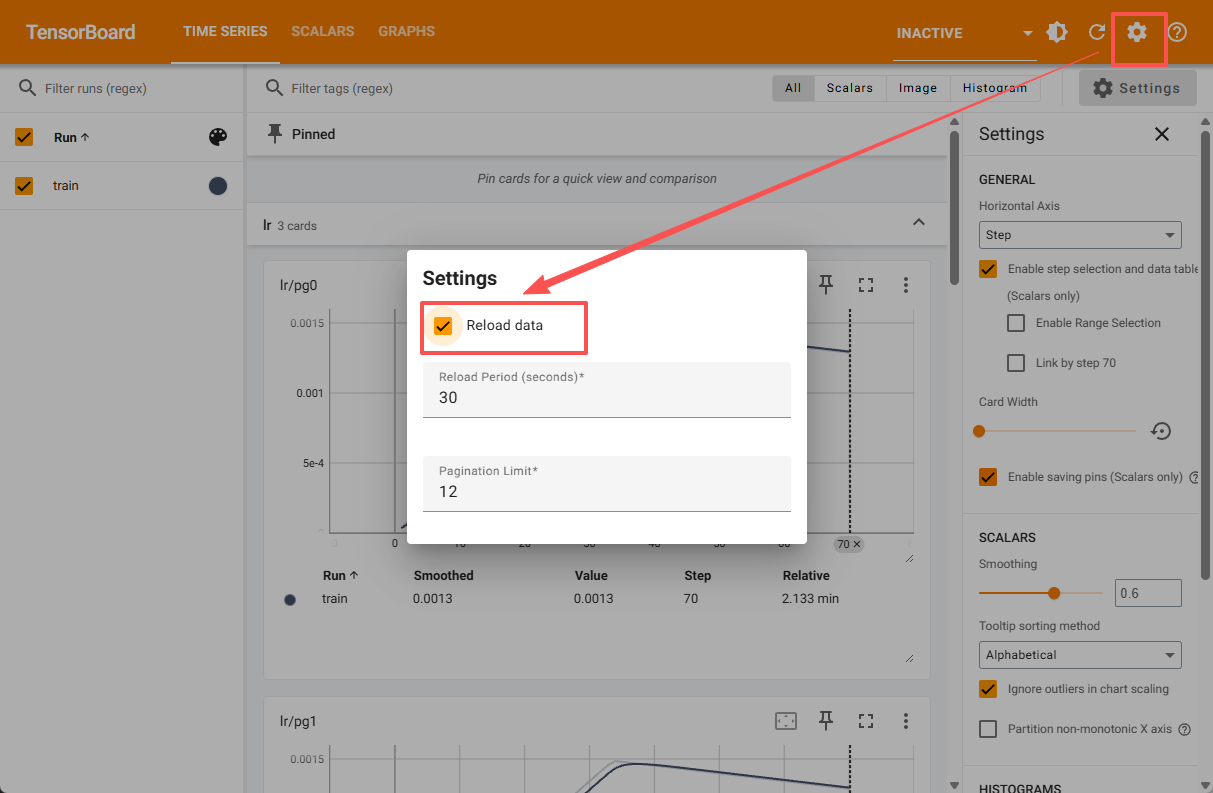
After checking "relaod data", TensorBoard automatically refreshes the data, every 30 seconds by default.
5. Auto Labeling Workflow
- Load the model: Select the best weight file that has been generated (
best.pt). - Set the threshold: Adjust Conf; a value between
0.3 ~ 0.5is recommended depending on the scene. - Run the labeling: The system automatically scans the image directory and generates the corresponding JSON labels.
- Verify and confirm: Use the "Image Annotation" module to carry out a quick manual review.
6. Final Results
Final Results
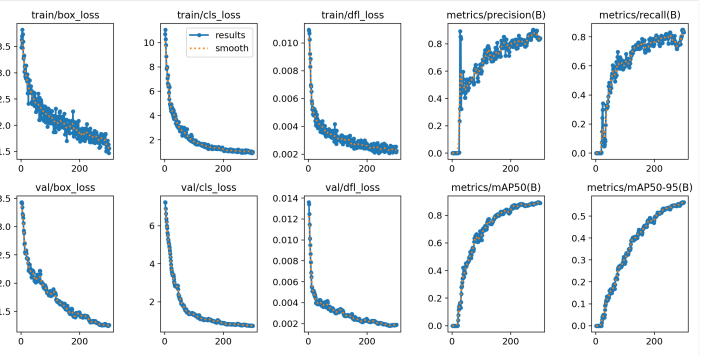
After training finishes, the final evaluation charts above are provided for reference.
Environment Notes
- Do not close the software console during training, otherwise the process will be forcibly interrupted.
- If you use OBB rotated box mode, make sure the dataset JSON format is defined correctly (Length1/Length2 are the half-width and half-height).